Tutorials
GLB to VRM: How to Convert and Prepare a 3D Avatar for VTubing
Convert a GLB model into a compatible VRM avatar, prepare its humanoid rig and expressions, then test browser tracking and OBS output in Virmii.
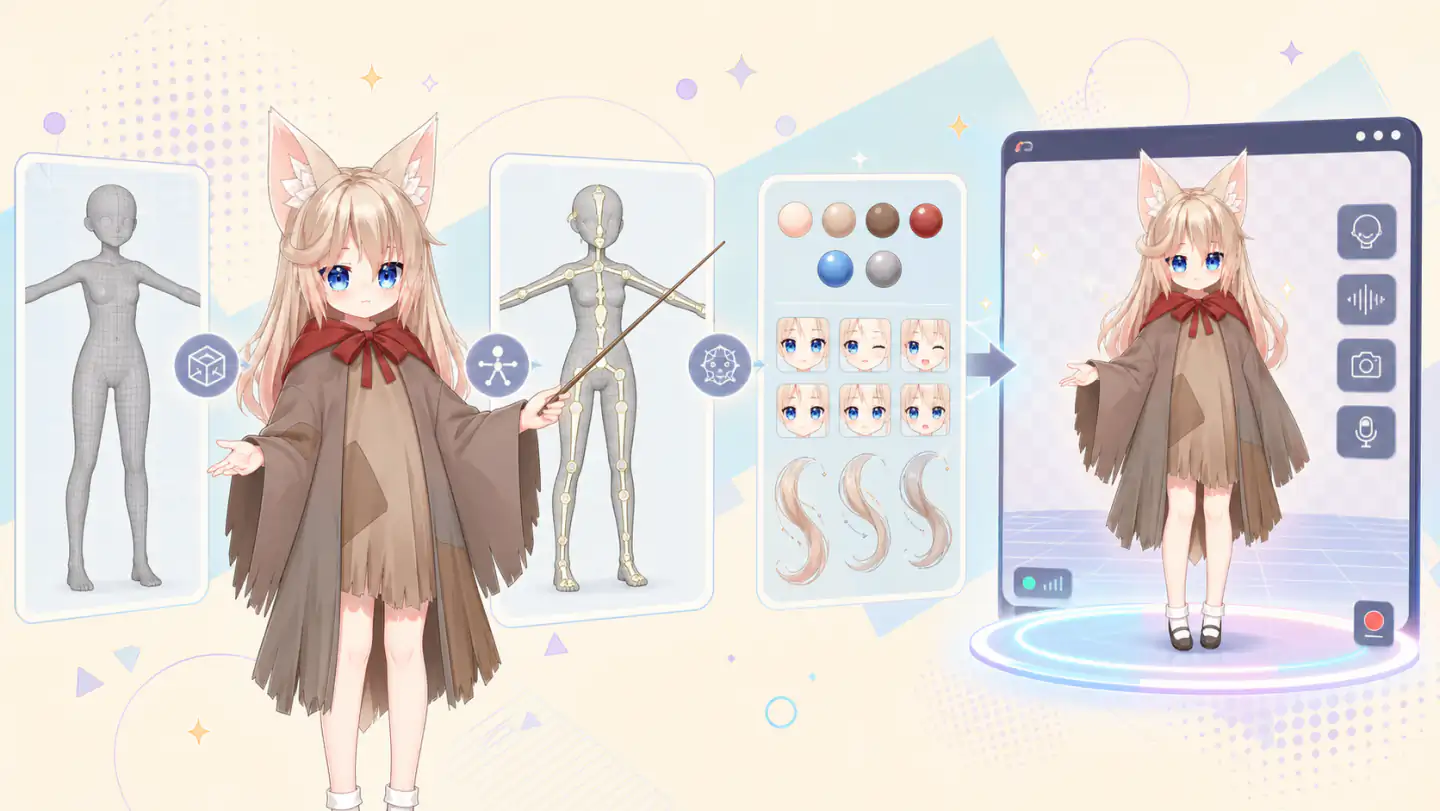
GLB and VRM are related, but they are not interchangeable
A GLB file is a binary glTF 2.0 container. It can hold meshes, textures, materials, animations, and a custom skeleton, but it does not tell an avatar application which node is the head, which morph target closes an eye, or how the model may be used.
VRM adds those avatar-specific definitions to the same glTF foundation. A VRM file identifies a humanoid skeleton and includes model metadata. It can also contain standard expressions, gaze settings, MToon materials, and spring-bone physics.
Those extra sections are why renaming .glb to .vrm does not perform a conversion. Virmii checks the uploaded file's internal glTF data for either the VRM 0.x VRM extension or the VRM 1.0 VRMC_vrm extension. A generic GLB with a different filename still fails that check.
Technical comparison: GLB container and VRM avatar
The formats overlap at the storage layer, but VRM adds conventions that an avatar runtime can understand without a model-specific setup screen.
| Area | Standard GLB | VRM avatar |
|---|---|---|
| Geometry and textures | Stores meshes, images, samplers, and buffers | Uses the same glTF structures |
| Skeleton | Allows any node hierarchy and bone names | Maps required nodes to named humanoid bones |
| Materials | Supports glTF PBR and related extensions | Can keep PBR materials or add MToon |
| Facial controls | Morph targets have no standard avatar meaning | Can bind optional preset and custom expressions |
| Secondary motion | Has no avatar-specific spring system | Can add the optional VRM spring-bone extension |
| Usage information | Does not define avatar permissions | Includes VRM metadata and usage conditions |
This distinction matters when a model moves between tools. A generic renderer can display either file, but a tracker needs the VRM humanoid and expression mappings before it knows which controls to drive.
What Virmii does after the conversion
Virmii does not currently provide a GLB-to-VRM converter. Complete the conversion in Blender with VRM Add-on for Blender, or in Unity with UniVRM, then upload the resulting .vrm file.
Virmii's custom-model workflow currently provides:
- private storage for up to three custom VRM models;
- uploads of one
.vrmfile at a time, with a 30 MB maximum; - an in-browser model preview and camera-based face tracking;
- a private, transparent live-stage URL for OBS Browser Source.
Virmii-generated jobs may also provide the source GLB as a download when it is available. That download is a generation artifact, not a custom GLB upload or conversion endpoint.
Choose VRM 1.0 or VRM 0.x
Use VRM 1.0 for a new model unless another application in your workflow requires VRM 0.x. Virmii's viewer accepts both formats, but the two versions use different extension names, expression names, coordinate rules, and metadata fields.
Do not combine fields from the two specifications in the same example. In particular:
| Purpose | VRM 0.x name | VRM 1.0 name |
|---|---|---|
| Happy expression | Joy | happy |
| Sad expression | Sorrow | sad |
| Relaxed expression | Fun | relaxed |
| Mouth shapes | A, I, U, E, O | aa, ih, ou, ee, oh |
| Split blink | Blink_L, Blink_R | blinkLeft, blinkRight |
VRM 1.0 expressions are optional in the specification. They are still important for VTubing: a model without the expected expression bindings can move its head, but it cannot reproduce every blink or mouth movement.
Choose a conversion tool and inspect the source
Blender with VRM Add-on for Blender is a practical choice when you need to repair weights, rename bones, edit shape keys, or tune materials. Unity with UniVRM works well when the rest of the production pipeline already uses Unity.
Before editing, keep an untouched copy of the GLB and check what it actually contains:
- open every mesh and confirm that the expected textures are present;
- inspect the armature hierarchy and skin weights;
- list the existing morph targets before creating new expressions;
- remove unused objects only after confirming they are not part of the rig;
- decide whether the final file needs VRM 0.x compatibility or can target VRM 1.0.
Run the chosen exporter's validator early. It is much easier to fix a missing head mapping before spending time on materials and spring bones.
Prepare the humanoid rig
Import the GLB into Blender or Unity and inspect the armature before assigning VRM humanoid bones. For VRM 1.0, the required mappings include:
- hips, spine, and head;
- left and right upper arm, lower arm, and hand;
- left and right upper leg, lower leg, and foot.
Chest, upper chest, neck, shoulders, eyes, toes, and finger bones are optional in VRM 1.0, although some were required by VRM 0.x. Map optional bones when the source rig contains them and the target applications benefit from them.
The model must use the VRM T-pose as its rest pose. Avoid applying VRM 0.x advice blindly to a VRM 1.0 model: VRM 0.x normalized humanoid bones more aggressively, while VRM 1.0 permits rest rotations and requires valid positive scale values. Let the current exporter validate the pose and coordinate conversion instead of manually forcing every bone rotation to zero.
Check the model in profile as well as from the front. Twisted elbows, reversed knees, mismatched left and right bones, and stray vertex weights often remain hidden until tracking begins.
Keep PBR materials or choose MToon
MToon is useful for an anime-style model, but it is not mandatory for VRM 1.0. A VRM can retain glTF PBR materials, and VRM Add-on for Blender can export Principled BSDF materials through the normal glTF material path.
Choose the material path that fits the model:
- keep PBR materials for metallic, rough, or realistic surfaces;
- use MToon when you want controlled shade colors, rim light, and outlines;
- use Opaque or Cutout for hair cards and eyelashes when full transparency causes sorting artifacts;
- reduce oversized textures when the final VRM exceeds Virmii's 30 MB upload limit or consumes too much GPU memory.
A 2048×2048 atlas is a reasonable starting point for a browser avatar, but there is no single correct texture size. Test the model on the hardware and scene you plan to stream.
For an MToon material, review four settings first. Lit and shade colors control the main light boundary. Rim lighting separates the silhouette from a dark scene. Outline mode and width determine whether the edge stays stable as the camera moves. The surface mode controls how opaque, cutout, and blended pixels are drawn.
Cutout usually works better than full blending for eyelashes and sharp hair cards. Use blending only where partial transparency is visible, because overlapping transparent surfaces can sort differently between renderers. After conversion, inspect the avatar on both light and dark backgrounds; a material that looks fine in Blender may expose halos or missing edges on the transparent OBS stage.
Bind the expressions Virmii can drive
Virmii processes raw camera video locally in the browser with MediaPipe. It uses camera-derived facial parameters; it does not currently capture microphone audio for lip sync.
For full facial tracking, prepare these VRM 1.0 bindings when the model supports them:
blink, or the split pairblinkLeftandblinkRight;aa,ih,ou,ee, andoh;happy;- eye bones, or
lookLeft,lookRight,lookUp, andlookDown.
Virmii reads a selected set of MediaPipe face blendshapes and converts them into those VRM controls. A source model may contain all 52 ARKit-style blendshapes, but Virmii does not directly drive all 52 channels.
For imported models, bind existing shape keys in a VRM-compatible editor without changing the mesh's vertex count. After creating expressions, do not apply modifiers that reorder or remove vertices, because that can invalidate the morph targets. For models created in Virmii, use the AI expression generation guide to add expression artwork inside Virmii.
AI expression generation costs 20 credits per set without a subscription. Creator and Pro use included monthly generations first; additional sets cost 20 credits. The initial charge is kept if generation fails. Each model version allows up to 2 free retries for missing or failed images, without using more credits, included generations, or model retry attempts. See pricing for the current monthly allowances.
Add optional spring-bone physics and metadata
Spring bones are optional. Add them to hair, ribbons, tails, or loose clothing when secondary motion improves the model. Configure colliders around the head, shoulders, and torso, then test sharp head turns for clipping or unstable motion.
First-person settings are also optional and mainly matter to VR or first-person applications. Virmii's Live Studio and OBS stage use a third-person presentation camera, so first-person mesh annotations are not required for that workflow.
Before export, complete the metadata in your exporter's VRM 1.0 interface. At minimum, confirm the model name, authors, avatar permissions, commercial-use setting, credit requirement, redistribution setting, and modification policy. Using the exporter's UI is safer than copying a JSON fragment that may belong to another VRM version.
Export a VRM 1.0 file from Blender
The current VRM Add-on for Blender stores the target specification version on the armature. A minimal automation example looks like this:
flowchart TD
    A["Import and inspect the GLB"] --> B["Map required humanoid bones"]
    B --> C["Choose PBR or MToon materials"]
    C --> D["Bind blink, mouth, and gaze controls"]
    D --> E["Add optional spring bones and metadata"]
    E --> F["Export VRM 0.x or VRM 1.0"]
    F --> G["Upload and test in Virmii"]
    G --> H["Create a private OBS Browser Source URL"]
For a manual export, confirm that the mesh and armature are selected as expected, choose the target VRM version, complete the metadata, and read every validator message before saving. Warnings about optional features may be acceptable; missing required humanoid bones are not.
The exporter still needs valid humanoid mappings and metadata. Setting spec_version does not repair an incomplete rig.
For a manual export, choose File → Export → VRM (.vrm) and resolve the validation errors shown by the add-on before saving.
Upload and test the VRM in Virmii
Open the Virmii model workspace and upload the exported .vrm file. The client and server both enforce the 30 MB limit, and the server verifies that the binary is a valid glTF 2.0 container with a VRM extension.
After the upload finishes:
- Open the model preview and confirm that the avatar is visible and framed correctly.
- Open Live Studio and allow camera access.
- Test head rotation, distance response, gaze, blinking, and each mouth shape.
- Move quickly enough to check spring-bone behavior.
- If expressions are missing, return to Blender, fix the bindings, export again, and replace the model.
Tracking quality depends on the file. Virmii can still provide head movement when a model lacks compatible facial expressions, but it should not be described as full facial tracking.
Send the avatar to OBS
From Live Studio, create a private OBS Browser Source URL. Add a Browser Source in OBS, set it to 1920×1080, and paste the URL.
Keep Live Studio open as the camera-tracking controller. Virmii sends movement and expression values to the private stage; raw camera video is processed locally in the controller browser by default. The stage canvas is transparent, so no chroma key is required.
Treat the stage URL like a private credential. Resetting or disabling it revokes the previous link. See the complete Virmii and OBS tutorial for the current interface.
Troubleshooting checklist
The upload is rejected
Confirm that the file is no larger than 30 MB, has a .vrm extension, and contains either the VRM 0.x or VRM 1.0 extension internally. Renaming an ordinary GLB is not enough.
The model loads but only the head moves
Check the expression names and bindings. Virmii only writes a value when the corresponding VRM expression exists. Verify the blink, mouth, happy, and gaze controls listed above.
The model is pink, dark, or transparent
Inspect missing textures and material settings in the exporter. A pink material often points to a missing or unsupported shader. Transparency problems usually require changing the material mode or fixing texture alpha, not converting every material to MToon.
Limbs twist during tracking
Recheck humanoid bone assignments, rest pose, left/right mapping, bone parenting, and skin weights. Run the exporter's validator for the VRM version you selected.
Hair or clothing clips through the body
Adjust spring stiffness and drag, then review collider placement and radius. Confirm the result in Virmii's viewer after every export.
Frequently asked questions
Can I convert a GLB by changing its extension to .vrm?
No. The internal glTF document still lacks a VRM extension and humanoid mapping. Virmii checks that internal structure after upload.
Do I have to use Blender or Unity?
You need a tool that can create a valid VRM file. Blender with the VRM add-on and Unity with UniVRM are the best-documented choices, but another exporter is acceptable if its output passes the VRM specification and loads correctly in Virmii.
Must every material be converted to MToon?
No. VRM 1.0 can use glTF PBR materials. Choose MToon for toon-specific shading controls, not simply because the filename ends in .vrm.
Does Virmii accept both VRM 0.x and VRM 1.0?
Yes. The upload validator recognizes both formats. Tracking quality still depends on the humanoid and expression data inside the file.
Final pre-stream check
- The uploaded file is a real VRM and is within the 30 MB limit.
- Required humanoid bones pass exporter validation.
- Blink and mouth expressions return cleanly to neutral.
- Eye movement works through eye bones or look expressions.
- Spring bones settle without persistent clipping.
- Materials render correctly on the transparent stage.
- The private OBS URL is not shared publicly.
With those checks complete, the converted avatar is ready for Virmii's browser tracking and OBS stage.